Scanning Photo Albums
How we are scanning dozens of photo albums and process them with open source tools
As a millennial, most of my childhood is not recorded in digital photos but in videos on VHS tapes and photo albums that my parents have. I like flipping through digital photos and so I decided that it’s time to get all the pictures into digital form. Now the question is how? In this post I am showing that a simple flatbed scanner and some open source command line tools (Fred’s ImageMagick Scripts, ImageMagick/GraphicsMagick, Parallel, Exiftool, and standard UNIX tools) are fast and produce good quality images.
Photo scanner apps are not good enough
My first idea was to use the good camera on my phone. I have seen apps such as Google Photo Scan that promise to avoid glare and other artifacts that you get if you just took a photo. I tried a few apps but none of them worked. It takes forever to scan a single photo, there are artifacts on the images, and since pictures are not flat, the scans often come out distorted.
Scanning and segmenting images with Image Capture almost worked
My next idea was to use the flatbed scanner we already have in our multifunction printer. The scans are actually really good. The problem is that I don’t want to crop all images by hand. I have a mac and the Image Capture app (which already comes with macOS) has a decent cropping function. However, it uses the scanner preview (scanners typically show you a quick preview, then you decide which region to scan, and then they scan the selected region). The preview often isn’t good enough to properly segment the image so I decided to build my own segmentation pipeline with some open source tools.
A pipeline for scanning and segmenting dozens of photo albums
The following pipeline worked well for us. In short, we scan full pages, crop them with multicrop, then convert them to JPEG, and set the correct dates.
First, we put as many pictures on the flatbed scanner as we can fit. Ideally, they are ordered from top-right, over to the left, to the bottom left when you put them on the scanner. This way they are in the correct order in the scanned image. Now, we scan the full page in 600 DPI (that’s my scanner’s max and it worked well) as TIFF. Scanning the full page means we don’t need a preview and can go through a photo album in half an hour.
Now we have a folder full of scans such as this one.
Note that all scans have the name Combi_{}.tiff. The rest of my scripts assume this name and so if you follow this post, make sure to set the right name in Image Capture.
The next step is to segment the images. Fred’s ImageMagick Scripts are really good for this task. I downloaded and installed (copied into my path and made them executable) the multicrop, unrotate, and autotrim scripts. To avoid problems with spaces, I first replace all spaces with _.
find . -type f -name "*.tiff" -exec rename "s/\s/_/g" {} \;
Then I crop images with Multicrop, which is documented here. I don’t want to process the images one by one so I use GNU parallel to run 6 processes at the same time (might be different for you).
find . -name "*.tiff" | parallel -j 6 --eta -q multicrop -c 50,50 -u 2 -m save -i yes {} {/.}_split.tiff
-c 50,50 says where to find the background color for segmentation. 50 pixels off the top right corner worked well for me. -u 2 uses a slightly better (but slower) algorithm to detect rotations. -m save saves the mask (for debugging purposes). -i yes trims the segmented images a bit so that we don’t get a white border.
Multicrop runs some algorithms to find a mask such as this one.

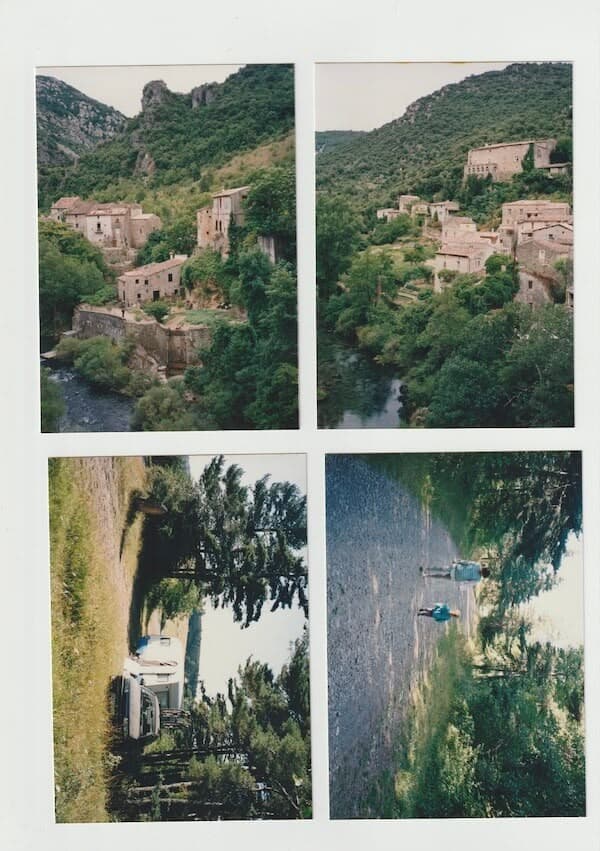
Don’t worry if the masks are not perfect. Multicrop then uses the mask to find the images to segment and outputs segmented images such as these four.

Multicrop takes a while to process images so you can grab a beverage of your choice while your computer is hard at work (such as mine was as you can see below).

Fixing orientation and converting to JPEG
Now we have nicely segmented images but they are often incorrectly rotated, are still TIFFs, and they have the wrong dates. I corrected the orientation manually in Finder.
Rotating images with Finder doesn’t always reliably rotate the images after processing so I had to apply the orientation change to the images. To do this and to then convert all images to JPEGs, I used GraphicsMagick (ImageMagick also works).
gm mogrify -auto-orient *_split-*.tiff
gm mogrify -format jpg -quality 90% *_split-*.tiff
Correcting dates
Next, I wanted to have correct dates in the images. However, I also wanted the images to have the correct order when I look at them in e.g. Apple Photos. My idea was to set the dates of the image to the correct date and to use the time to sort them correctly. To set the right time, I set it based on the file names (which are in the correct order).
But first I made a folder for each set of images that I wanted to have the same date.
My files are Combi_{i}_split-{sss}.{tiff,jpg} where i is a sequence number (e.g. 0, 12, or 32) and sss is a three digit number that identifies an image inside a scan. I set the minutes to i (by adding a leading 0 if needed and subtracting a start value so I don’t go over 59) and seconds to s. I assume that there are at most 8 images per scan and that there are at most 59 scans. Since I put all scans that should have the same date into one folder, this limitation hasn’t been a problem.
I created the following bash script, which I called setdatetimeoriginal and put it in my path. It uses Exiftool to set the DateTimeOriginal EXIF property as described above.
#!/usr/bin/env bash

set -e

start=$1
end=$2
date=$3

for m in $(seq $start $end)
do
    echo "Setting dates for Combi_${m}_split-00*.*"
    minutes=$(printf "%02d" $(($m-$start)))
    for s in $(seq 0 8)
    do
        file=Combi_${m}_split-00${s}
        if test -f "${file}.tiff"; then
            exiftool '-datetimeoriginal='"${date}"' 12:'"${minutes}"':'0"${s}"'' -overwrite_original ${file}*
        fi
    done
done
Now, I can run setdatetimeoriginal 27 32 1990:10:15 to set the dates and order (by time) of all images in a folder. The output of the script looks something like this.
Setting dates for Combi_27_split-00*.*
    2 image files updated
    2 image files updated
    2 image files updated
    2 image files updated
Setting dates for Combi_28_split-00*.*
    2 image files updated
    2 image files updated
That’s it. I am really happy with the results. I was especially impressed with the quality of the segmentations and hope that you find this post useful if you want to scan your family photos.